Minnie's Milestones
  • Home
  • Milestones
  • Passions
    • Shabby Chic Decor >
      • Image Transfer Tutorial(s) >
        • Freezer Paper and Ink Jet Printer
        • Citra-Solv Method
        • Chalkboard Transfer
    • Outside Decor
    • Cottage Gardening >
      • Butterfly Santuary
    • Photography
    • Digital Scrapbooking
    • Mixed Media Art
  • Recipes
  • Advertise/Selling
  • Muse
Minnie's Milestones

hypertufa fake gardening

3/7/2017

4 Comments

 
Picture
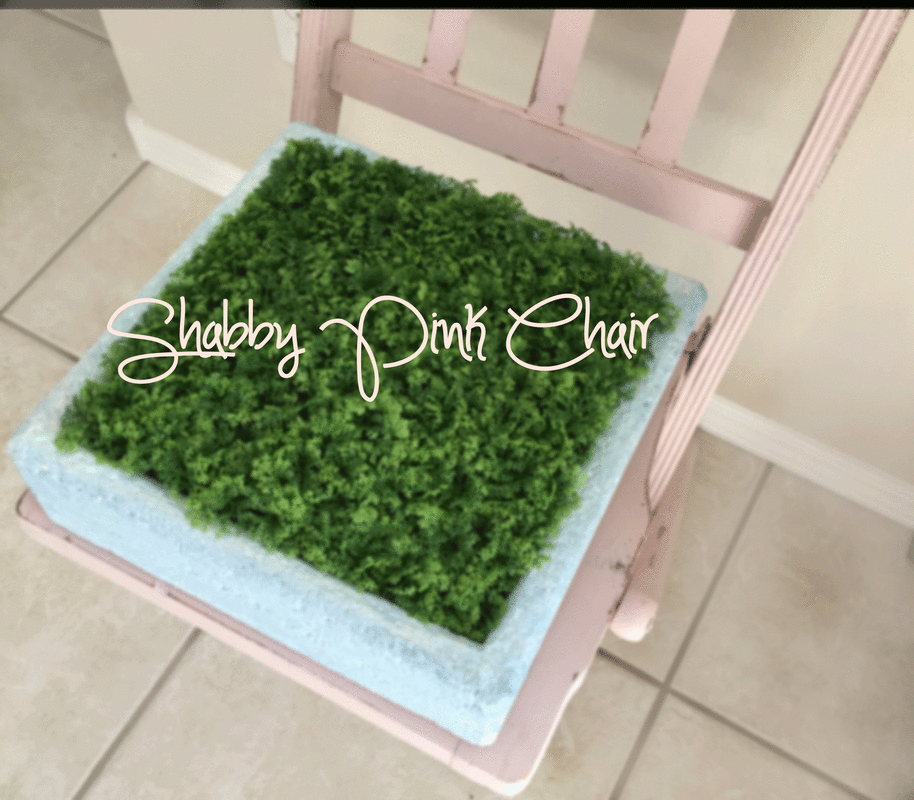
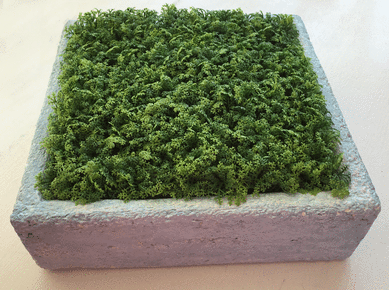
This was my first attempt at hypertufa planter/pots over ten ago. This square planter has been used for many things, the last was a water bowl  for Toby, our Wheaten Terrier. I purchased this sheet greenery mat at Michael's and was delighted when it fit perfectly in my old hypertufa planter. The dimensions of the planter are 11 1/2 x 11 1/2 inches,  3 1/2 inches tall and 2 1/2 inches deep, so that makes the thickness about 1 1/2 inches. The greenery is 10 x 10 inches. Michael's has several sheets to pick from, it was a difficult decision whether to purchase the moss mat or the one I picked. 
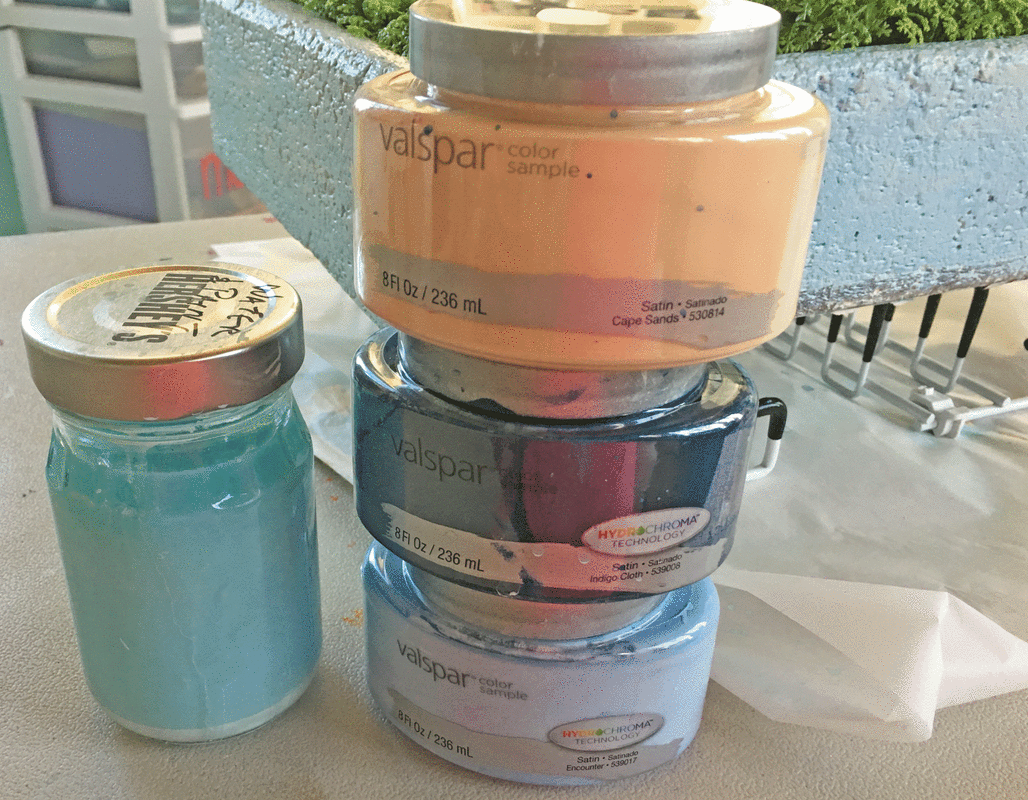
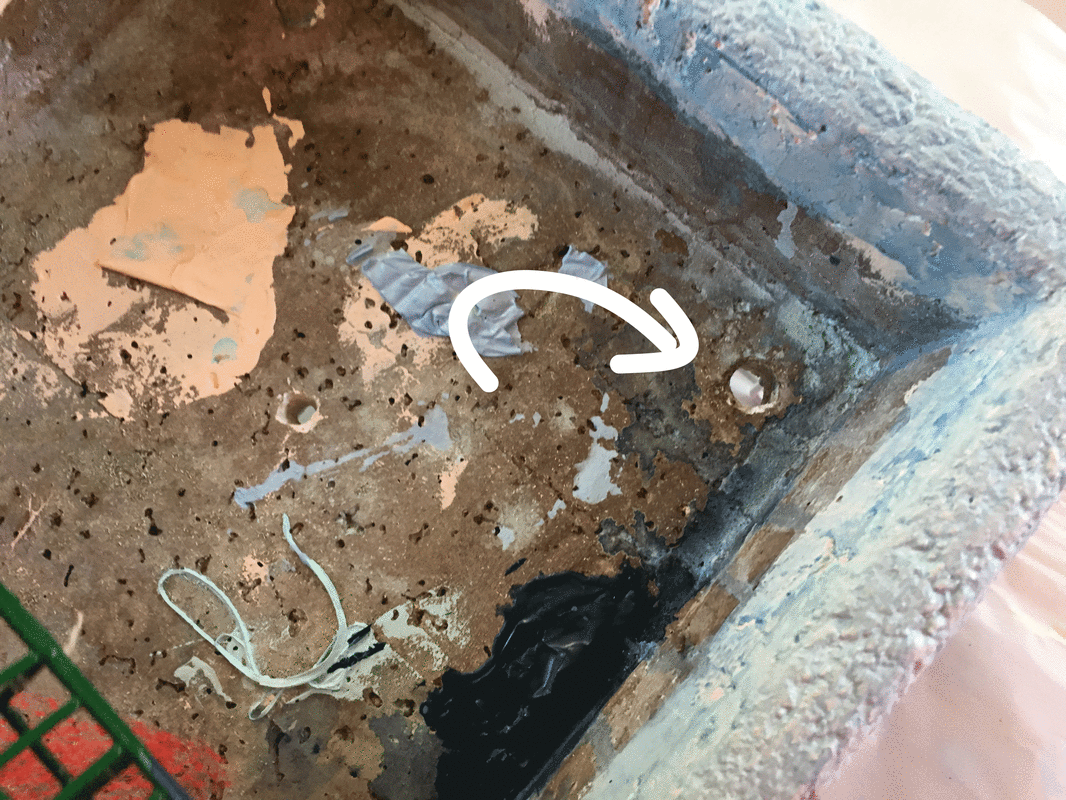
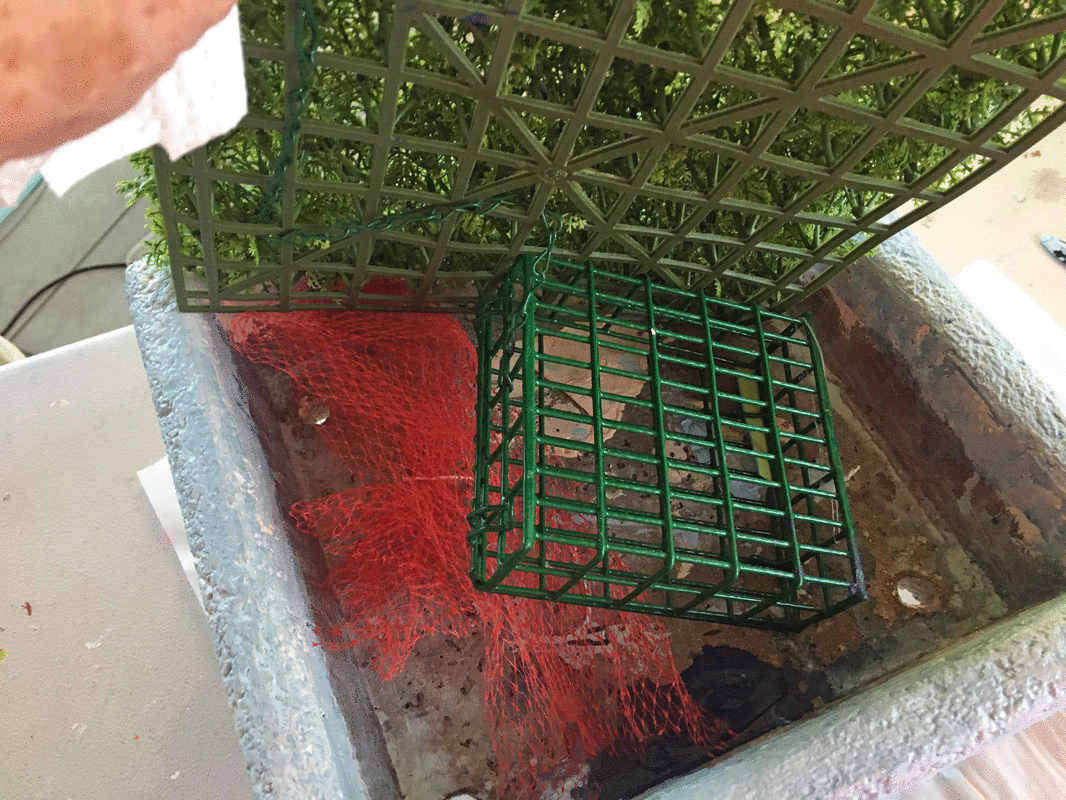
The planter had been painted a dark brown. I painted the planter first with the coral, then the dark blue and finally with the light blue. I then washed it (painted) several times with the turquoise/water paint that I have mixed up to add a patina finish to many things.  
I will have this planter outside this season, so I had my handy, dandy hubby drill holes for drainage.
So the greenery mat will not blow away, I added a bird feeder with a chain/hook and attached the feeder to the bottom of the planter. It also raised the mat up to the edge of the planter, which achieved the look I wanted for the finished planter. Also I added a fruit sack for added stuffing. These will work great so the planter does not retain moisture.

Now deciding where to put this easy care garden.

Picture
 I don't make planter/pots like this one anymore but
​Kim at Hypertufa Gardener does and you
can ​check out her site here: http://www.thehypertufagardener.com/
​I do make leaves and such and you can check out my previous posts in the subcategory Cottage Gardening or individual posts here:
​Garden Grots
Concrete Leaves in the Garden
​Concrete Leaf Spitter
For the Love of Gardening  
​ Oak Hydrangea Leaf

Amy Vanderbilt's Etiquette
regarding bowling:
​Don't us another person's ball without permission. ;-)
​

Sharing my post with these AWESOME blogs:
​A Delightsome Life
​Adventures of Mel
​Artsy-Fartsy Mama
​Share Your Style
​Chic on a Shoestring
​Nifty Thrifty Things
​FabiFabu​​
​
FEATURED HERE:
Picture
4 Comments
Cristina link
3/13/2017 01:58:36 pm

It looks so nice! You did such a good job!

Reply
Jonni
3/13/2017 04:32:14 pm

Thank you!

Reply
Lisa Silfwerbrand link
3/17/2017 07:28:03 pm

This is so cute!! I love "gardening" that takes very little work and looks so good <3 Thank you so much for linking it up to the Inspiration Galore Project Party last week. You are one of my Features this Sunday over at http://www.recreateddesigns.com Have a lovely weekend!

Reply
Jonni link
3/21/2017 09:55:23 am

Awesome! Thank you very much!

Reply

Your comment will be posted after it is approved.


Leave a Reply.


    Picture

             The Lady  behind
        Minnie's Milestones

    ​Welcome lovers of whimsy. If you love chippy paint and lots of DIY we are kindred spirits!

    BLOGLOVIN
    Featured on Hometalk.com
    Visit Minnie's Milestones by Jonni's profile on Pinterest.

    Archives

    November 2019
    September 2018
    August 2018
    July 2018
    May 2018
    April 2018
    February 2018
    January 2018
    December 2017
    November 2017
    March 2017
    February 2017
    September 2016
    June 2016
    May 2016
    April 2016
    March 2016
    February 2016
    December 2015
    October 2015
    June 2015
    May 2015
    April 2015
    March 2015
    February 2015
    January 2015
    December 2014
    November 2014
    October 2014
    September 2014
    August 2014
    July 2014
    June 2014
    May 2014
    April 2014
    March 2014
    February 2014
    January 2014
    December 2013
    November 2013


    Since
    ​2016/3/24​

    Picture
    This policy is valid from 10 April 2018
     This blog is a personal blog written and edited by me. For questions about this blog, please contact  shellknoblakegirl@gmail.com.
     This blog accepts forms of cash advertising, sponsorship, paid insertions or other forms of compensation.
     The compensation received will never influence the content, topics or posts made in this blog. All advertising is in the form of advertisements generated by a third party ad network. Those advertisements will be identified as paid advertisements.
     The owner(s) of this blog is compensated to provide opinion on products, services, websites and various other topics. Even though the owner(s) of this blog receives compensation for our posts or advertisements, we always give our honest opinions, findings, beliefs, or experiences on those topics or products. The views and opinions expressed on this blog are purely the bloggers' own. Any product claim, statistic, quote or other representation about a product or service should be verified with the manufacturer, provider or party in question.
     This blog does not contain any content which might present a conflict of interest.
    To get your own policy, go to http://www.disclosurepolicy.org
​